This will be the first post in a series that demonstrates how we can utilize this feature to quickly find all the ducts and steel in a model and use what we find for coordination purposes.
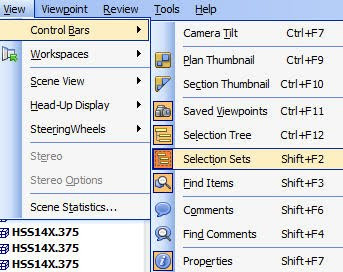
Let us dive right in and explore this feature. First, you need to turn the feature on in the interface. In Navisworks 2010, you can go to View>Control Bars>Selection Sets (shown below)or you may use Shift + F2 to turn the window on in the view. In Navisworks 2011 you can turn the window on by going to View>Window and checking the Selection Sets option from the list or you can use the short cut listed above.
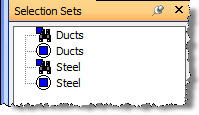
Once you have the window open and docked ( I usually have it on the upper right side of my screen) you can utilize the feature as necessary. As you can see in the image below, I have created two Selection Sets and two Search Sets. Searches are shown as a small blue square with a pair of binoculars, sets are shown as a large blue square circumscribed by a circle.
How do you create Search and Selection Sets you ask? They are created in different ways within the program. Let's look at Selection Sets first. A Selection Set can be created by one of the following methods:
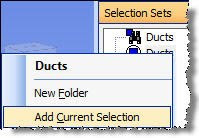
- Select some items in the view window by either picking on them and holding shown your Shift key to add items to the selection or you can use Select Box (in Revit this would be Select Region and in Autocad this would be known as a Window Selection or Crossing/Fence Selection). After selecting your items, simply put your mouse in the Selection Sets window, right click and choose Add Current Selection from the right click menu options.
- Select items from the Selection Tree and then place your mouse in Selection Sets window and choose Add Current Selection from the right click menu options (see image below, left).
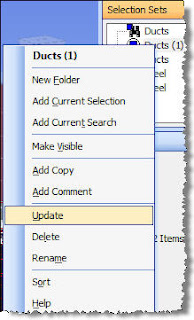
To update a Selection Set you will need to select additional items by one of the two methods mentioned above, and then right click on the Selection Set in the Selection Set window and choose update from the menu options as shown in the image below.
This is an important distinction between Search Sets and Selection Sets. Selection Sets are a snap shot of a point in time (when you created them). The do not update on their own. If you add more data to the Navisworks project, such as more steel or ducts, the Selection Set will not update to reflect these changes. You will need to manually update the set.
Search Sets on the other hand, do automatically update because they are not based upon a manual selection, but rather search the dataset for a specific property such as a word in a layer name (i.e. steel, duct, conduit, valve, etc.) or a material name (ASTM - A572 - Grade 50), or even a specific cost!
To create Search Sets, you need to utilize the Find Items tool to first search for the specific property and then save the search in the Selection Sets window. I have provided an example in the image shown below. As you can see I searched all the data sets in the file for a property that has a material assigned to it that contains the word "steel". The Find Items tool (Shift + F3) quickly found 9601 items. Imagine how long it would take you to select all the steel in the dataset manually! You can see that this feature alone will increase your ROI within a week's time!
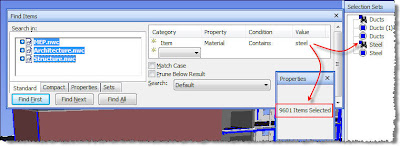
The great thing about this search is that because it is based upon a property, the next time I open this project with an updated structural model, it will update to reflect all the steel in the model. I will not have to update it manually. Looking forward, you will see how this will impact your clash events in Clash Detective.
In my next post, I will provide some tips and tricks on how to create search sets that can be utilized project to project as well as some tricks about folder structure within the project.
Regards,
Teresa
